Archive for the ‘Image Editing’ Category
Make Notes – Tip 1
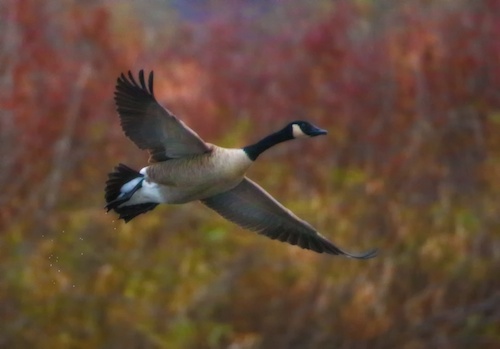
When you go back and look at your awesome image, make sure you can remember what you did!
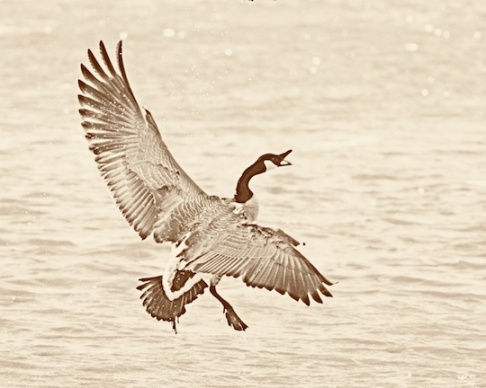
One of the things that really dives me nuts is when I go back and look at an older image of mine and just can’t remember all the tweaks and pokes I did to make it pop. Now this doesn’t really apply to the standard raw editing elements (exposure, highlights, shadows, contrast, etc) but it certainly applies to creative edits, especially filters and plug-ins. Now, when I run across the above image two years from now, I can look in the notes field and see that I added a couple special items – first was a recipe I built in Nik Color Efex Pro followed by a Topaz colored sepia filter.
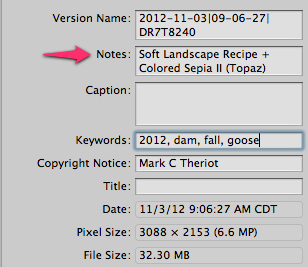
I created a custom field in my image editing program (Aperture) but you can use standard fields if you’d prefer. “Caption” is probably the easiest, and you can over write your notes when you do a digital export to an online photo gallery. Here are a couple other things to keep in mind:
- Label your special effects/filters in the order they are applied, separated by the “+” sign
- Don’t wait to do it “later”, make the note as you apply each unique item
- Use a similar schema in PhotoShop layers, title the layer with a descriptive of what you did
Have fun and stay in focus,
Mark
Rule of Curved Thirds
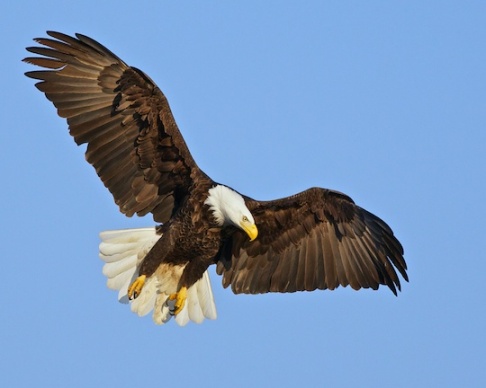
Most everyone has heard about the “rule of thirds” – but let’s try something a little more flexible – how about “curving” the thirds for more creative control?
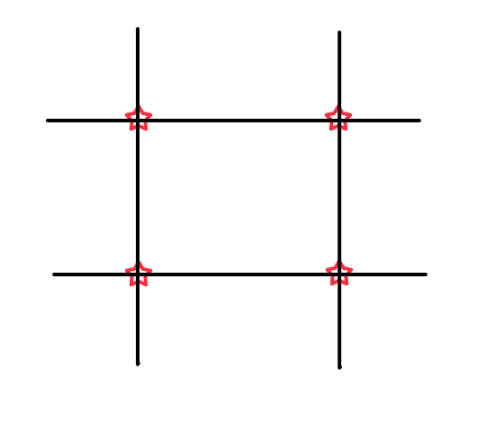
The standard Rule of Thirds divides the image into segments as seen below. The theory is to place the element of focus (head, eye, branch, horizon, etc) so that it lands on one of the intersection points. This provides very good guidance in many cases, but sometimes it just doesn’t work very well.
Consider the image below. The Rule of Thirds might suggest that you place the goose’s head in the upper right quadrant, also giving the goose “room” to look into.
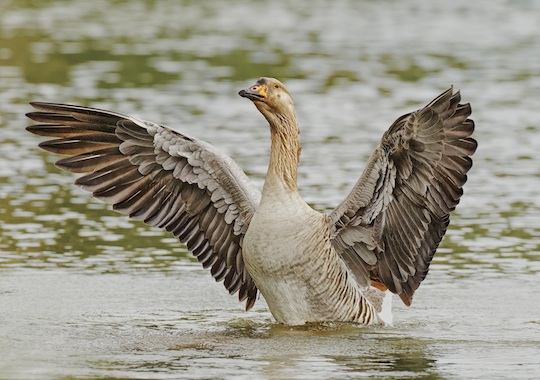
Since I wanted a tight crop and less “river” I placed the goose right in the middle of the frame, not only breaking the rule but doing what some would consider a “rookie” mistake by placing my subject right in the center of the frame.
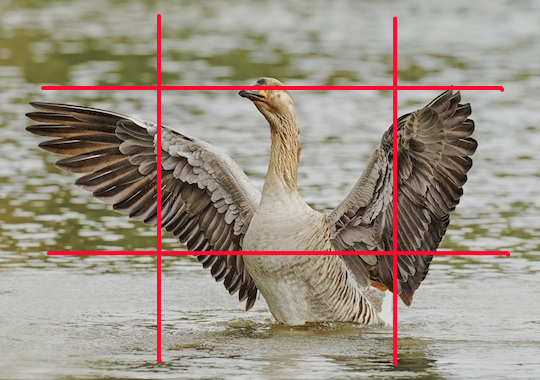
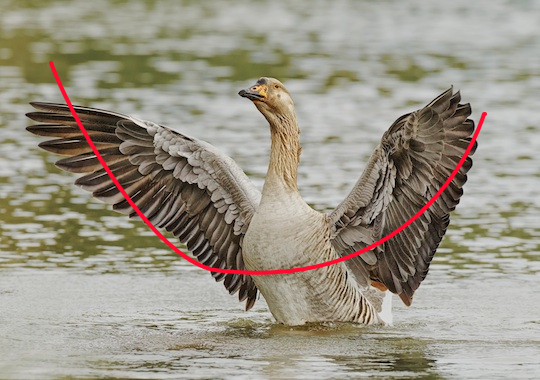
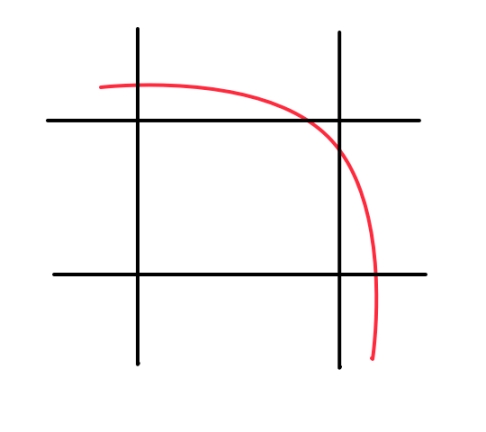
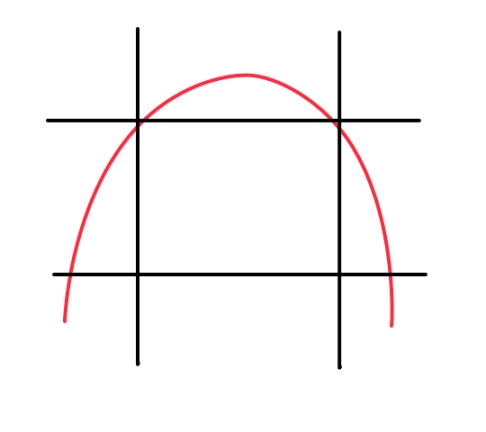
There was a method behind the madness though, I placed the goose along curved lines. Take a look at the illustration below, the curved red line was the point of emphasis that I was aiming for. Borrowing from the Rule of Thirds, I identified a curved shape in my subject (from the left wing, down to the breast and back up to the right wing) and allowed the curve (not a particular point of the subject) to interact with the Rule of Thirds and the intersection points. In addition, one of the traditional points of focus, the goose’s eye, is NOT in the center of the frame, it actually falls along the top grid line.
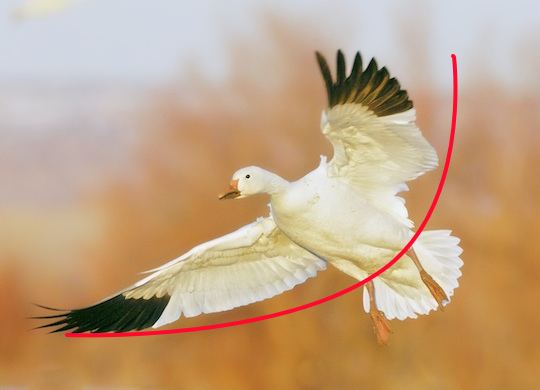
Here’s another example below. The natural focus of this Snow Goose would be the head and eye. Strictly following the rules would have you place the goose’s head in the upper left or upper right intersections. Neither would have worked very well in this case so I used a curve running along the goose’s wings and upper legs. The curve then becomes the item that intersects with the Rule of Thirds – it works for me!
The samples below give a few examples of a curved shape interacting with the grid, give it a try on some of your photos and see what you think.
Rules are good, but purposely breaking them can take the shackles off and open up your creativity. Don’t restrict yourself, let your eye naturally find the curves in your subjects – use those curves as your creative element.
Got an opinion on this or have other ideas, leave me a comment or shoot me an email – I’d love to hear what you think!
Stay in focus,
Mark T
Don’t Sharpen That Image!
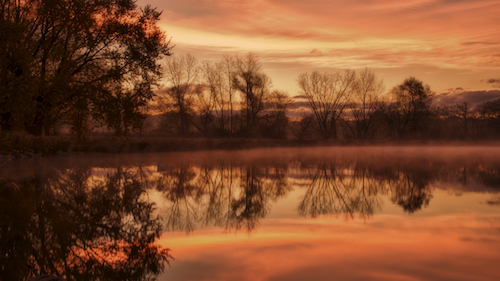
Sharpening is a normal part of the editing process, but keep your eye out for the right image to “mix it up” a bit.
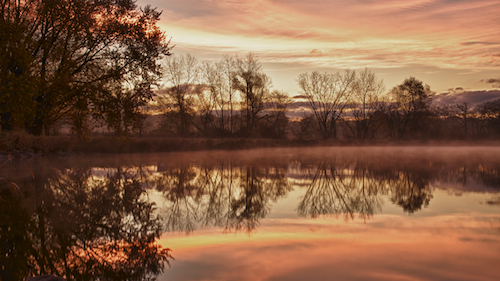
We all know the best process to follow – always sharpen last . . . right? That’s the way I do it (usually selective sharpening in Nik Define) – that is, until I stopped “always sharpening”. Depending on the subject, maybe sharpening would ruin a budding image. Consider the mood and feeling of each shot to determine how best to complete it – let it “talk to you”.
- In the opening image, I purposely softened the shot, along with “richening” up and warming the tones in Nik Color Efex Pro 4.
- The second image is a sharpened version with a little more contrast in the tones. It’s not a bad image (at least I don’t think so) – it’s just different. Given the warm glow of the cloudy sunrise – I just liked the moody (unsharpened version) better.
Just something to think about!
Stay in Focus!
Mark
White on White
Excerpt from “The Shooter’s Blueprint” Series
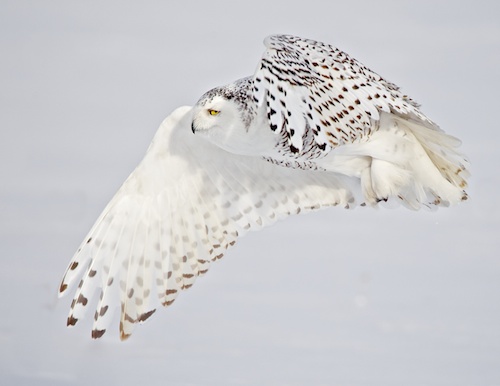
I’ve received a lot of questions lately due to a guest post I did on Photographer Rick Sammon’s Blog regarding capturing a white subject on a white background. Especially with winter around the corner for some of us, I hope the tips below help.
Shooter’s Blueprint
White Subject on White Background
The settings will vary depending on what the exact scenario is, so let’s use the parameters below.

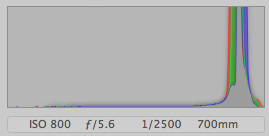
The trick to this shot is to expose as far to the right as you possibly can, without blowing any highlights out. With a white subject, you want your data to be almost entirely in the right third of the histogram. Anything less than that and your whites will start to look muddy, and correcting them will result in less than stellar results.
Blueprinter’s disclaimer – there is always more than one way to accomplish something, this just happens to be the way that works for me. All adjustment references are related to Apple Aperture software – other packages have similar adjustments.
Camera Setup:
- Exposure Program: Shutter Priority
- Aperture is not an issue with this shot – there is only one subject and it is fairly far away. (Depth of Field on this shot was around 1.5 feet)
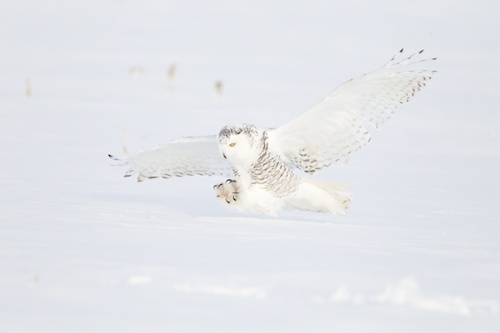
- Shutter Speed: For a moving subject, 1/1,000th is minimum – I chose 1/2,500th for these owl shots
- ISO: 400
- Exposure Compensation: 1.67ev
- It’s takes time to get a feel for this, just remember what you’re trying to accomplish (exposing for the whites, as far to the right as you safely can and no blown highlights) takes practice. It was a bright day and a lot of white in front of me – I started at 2.0ev and came down slightly after consulting my histogram. (oh yea, take test shots before the feathers start flying!)
- Focus: AI Servo (Canon speak for continuous)
-
- I used a cluster of focus points in the right of my frame as this owl was making his runs into the wind (right to left). Using the right points allows me to leave room in front of the owl.
- When focusing on a white subject, find some contrast to lock onto (that’s how most focus systems work) The Owl’s upper chest with the dark bands was perfect and roughly on the same plane as his head and eyes.
Original RAW Shot
Original Histogram
Post Processing:
- White balance: Tweaked slghtly
- Black point: Adjustment cranked up about halfway
- Just shy of blocking the dark claws
- Definition Slider:Moderate adjustments (up to half way)
- Be careful not to blow any highlights out in the process
- Shadows Adjustment: Moderate to high adjustments here returning depth and detail
- Levels Adjustment:Basic adjustments as needed for accurate balance.
- Be careful of a blueish color cast bleeding over into the subject
- Sharpening: To personal taste and output goals
The adjustments above yielded the results below.
Final Image
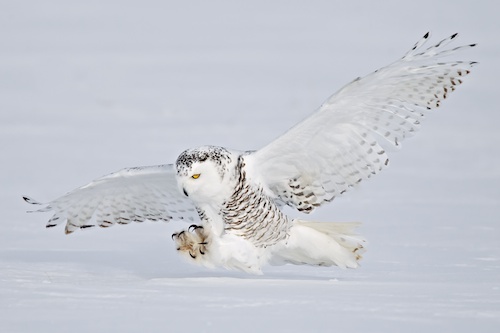
Final Histogram
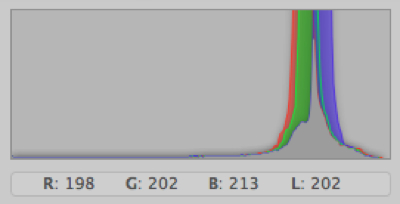
Your digital sensor captures more detail in the right third of the histogram, so the goal here is to get as much of this “white” data in that area – without blowing any highlights – I know, it’s a thin line to walk, but you can get ever closer to it with practice. Post processing (Black Point, Definition and Shadows adjustments) then allows use of this maximum data to adjust as needed and end up with a great shot!
One Final Tip . . .
This technique is accomplished shooting raw – so don’t go by the image on your camera’s back screen as reference in the field (it will look washed out). Rather make sure you didn’t blow any highlights (no “blinkies” in your histogram) and create your final image in post.
Have fun and stay in focus!
Mark
Make Lemonade!
It happens to all of us, amateur and pro a like, you think you have a great shot in the field, only to get home and find out it’s just not quite right. Maybe you blew the highlights a bit, or missed the focus, or . . . take your pick, there’s a whole bunch of possibilities! So what do you do now, trash it?
I don’t think that should automatically be the next choice – at least not yet! If the image has some character, let’s get creative and try to save it! Take a look at your image editor of choice (or plug-ins that work with it) and see what filters are available – just start playing around with the options – try black and white and go from there – see what happens! (remember, you were probably ready to trash the shot – so it’s not like you going to ruin it or anything!)
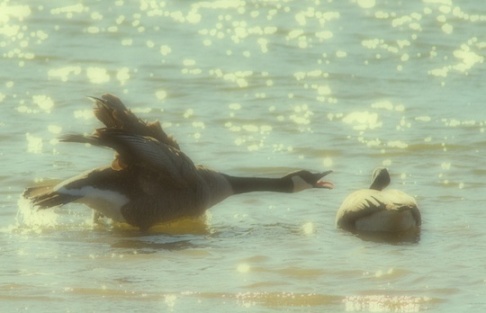
The shot above was almost completely “bad lemons” (blown highlights and out of sharp focus) but it had some character to it These fellows were having a gentleman’s disagreement over a lady and the goose on the left seemed to be yelling directly in the the other chaps ear.
From the Imperfect Photographer’s Dictionary . . .
Bad lemons: all the sugar in the cupboard won’t make these images sweet! A really bad lemon usually has three or more critical flaws (the geese above have two) or a particular flaw is exceptionally bad. For example, if the focus was so terrible that you couldn’t identify the critters as water fowl, that would probably qualify!
This image was too cute, I had to do something to save it. My personal choice in filters is Nik Color Efex Pro and the primary effect in the goose image is an effect called “Glamour Glow”. Now it’s still not a great image – but I like the personality it has! If an image is technically perfect, but boring, there’s not much you can do – but an interesting image will give you some latitude and allow some imperfections to be overlooked.
Give it a try the next time you end up with lemons, make some lemonade. Checkout my “lemonade” gallery, I decided to get my own collection together!
I’ve included some links to a few good creative filter packages, check out the trials and see what you think!
Overexposed?? – No Problem (Part 3)
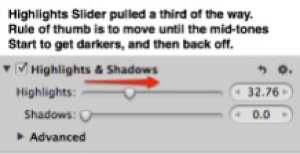
We left off with last time in this series having completed exposure and recovery adjustments. The next step is to selectively adjust only the highlights. The easiest (90% of the time) way to do this is the Highlights and Shadows Adjustment sliders (as Aperture calls them).
In this case, we obviously want to reduce the highlights, so that’s the one we’ll work with. Pull the slider to the right and watch the preview. It’s takes a little bit of a feel to know how much is too much, but the general rule of thumb is to watch the mid-tones.
Move the slider while watching your preview, as soon as you see the mid-tones of the image being impacted by the Highlights slider – stop. Now back off the adjustment just a bit.
The results can be significant, as the histogram below demonstrates. Notice the better balanced readings, with nothing on the right edge.
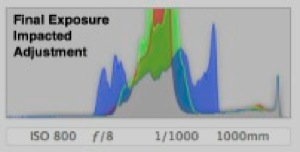
Compare that to the original histogram before we started with any adjustments. Major improvement here overall – including a successful recovery of the blown out areas (Only RAW would allow you to accomplish this!

And here is the final exposure result. The only other adjustment made here was a slight tweak to the Black Point slider. A usable and pleasing image has emerged from a shot that was destined for the trash can!

Stay tuned . . . more tips to come in the week and months ahead, including one technique where we will actually straddle that right exposure limit – on purpose!
 Comments (2)