Archive for the ‘Tips and Tricks’ Category
Make Notes – Tip 2
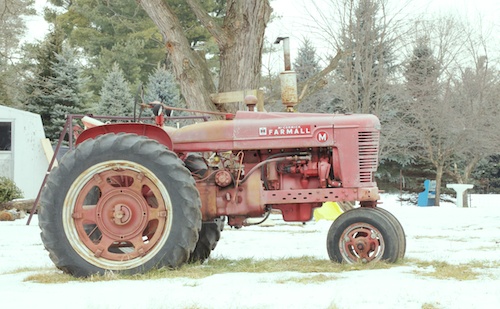 Make sure you remember to plan those “memorable” images to come
How often do you pass by an object or a certain location and say to yourself “wow, this would be a great picture if only ______” ! Fill in the blank: “good light”, “cloudy day”, “it was wet”, “it was dry” . . . . and so on. Well, here’s an opportunity to make some of your own luck. Create a “shooters to do list” and add your new found opportunity.
When you find that special something, follow these steps:
- Snap a cell phone shot of the scene or object:
- If you’re using a relatively new phone, not only will you have a reference image (like the opening shot in this post) but you’ll have the GPS info embedded, enabling you to find the location in the future.
- Use a voice recorder app on your phone (or make paper or mental notes) to note the best shooting direction, lens you’ll want to use and what unique elements you’d like to have for the image. In the above tractor image, it was already late fall with some snow on the ground. I visualized an overcast day just after a fresh snowfall so that’s the conditions I figured would look the best for this shot. Here are a few examples of elements you may desire for your future plan:
- A certain time of the year, like fall – or maybe the dead of winter when everything is barren?
- Would the shot be better in early morning or late evening?
- Could it be a nice “rainy day” shot?
- Should you wait for a foggy morning?
- Are you looking for a bright day with shadows just so – or would a totally overcast day be better?
- When you return home, build a quick record of your planned “shoot”. Doesn’t have to be fancy, even just placing the info on a single sheet in a word processor will do. Save it electronically along with a calendar reminder or just print it out and keep your planning file the old fashioned way.
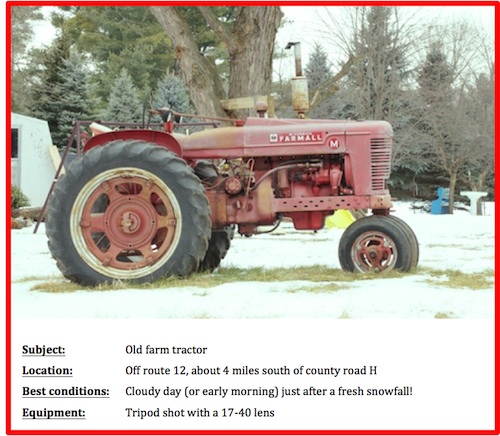
With a little bit of advance planning when you find something of interest, you’ll be able to return at the right time and capture a great photo. The tractor shot below is what I ended up with about four weeks after I took the original cell phone picture and envisioned the “perfect” shot. I also had a ball in the process!
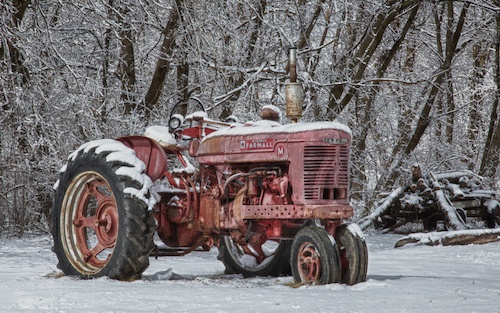
So the next time you see potential – make your own luck!
Stay in focus,
Mark
Make Notes – Tip 1
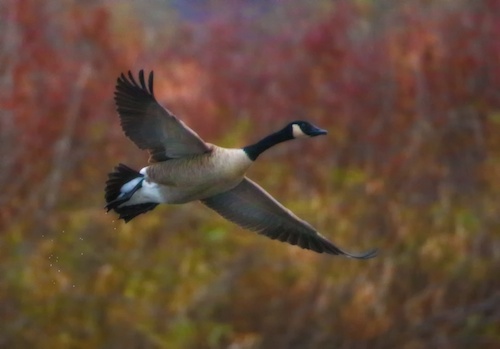
When you go back and look at your awesome image, make sure you can remember what you did!
One of the things that really dives me nuts is when I go back and look at an older image of mine and just can’t remember all the tweaks and pokes I did to make it pop. Now this doesn’t really apply to the standard raw editing elements (exposure, highlights, shadows, contrast, etc) but it certainly applies to creative edits, especially filters and plug-ins. Now, when I run across the above image two years from now, I can look in the notes field and see that I added a couple special items – first was a recipe I built in Nik Color Efex Pro followed by a Topaz colored sepia filter.
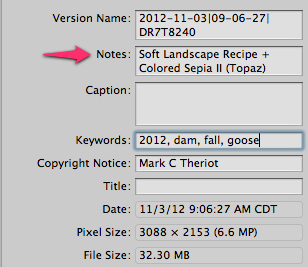
I created a custom field in my image editing program (Aperture) but you can use standard fields if you’d prefer. “Caption” is probably the easiest, and you can over write your notes when you do a digital export to an online photo gallery. Here are a couple other things to keep in mind:
- Label your special effects/filters in the order they are applied, separated by the “+” sign
- Don’t wait to do it “later”, make the note as you apply each unique item
- Use a similar schema in PhotoShop layers, title the layer with a descriptive of what you did
Have fun and stay in focus,
Mark
Duck Bill Do’s and Don’ts
The Little Things Make a Difference
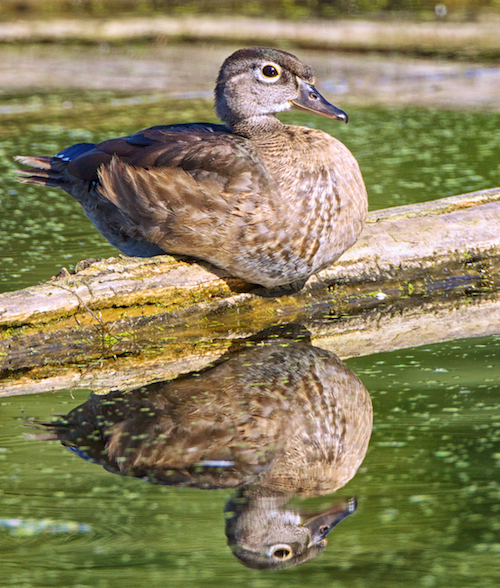
The opening image isn’t perfect from a composition standpoint (I don’t like the dark line running right across this Wood Duck’s head or the contrast change running through his head) but the angle and position is pretty good. Good eye and head position compliment the upright pose of the bill, turned slightly towards the camera and the gap between the beak and the body looks natural.
Discussed below are a few of the things to avoid.
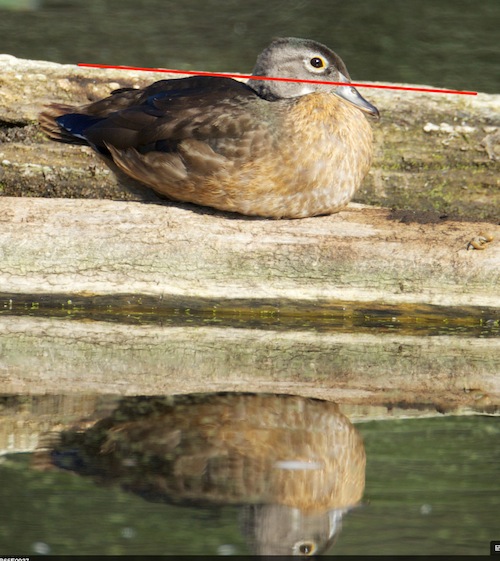
This first image is a non-starter, the top of the log cuts right through the head and bill.
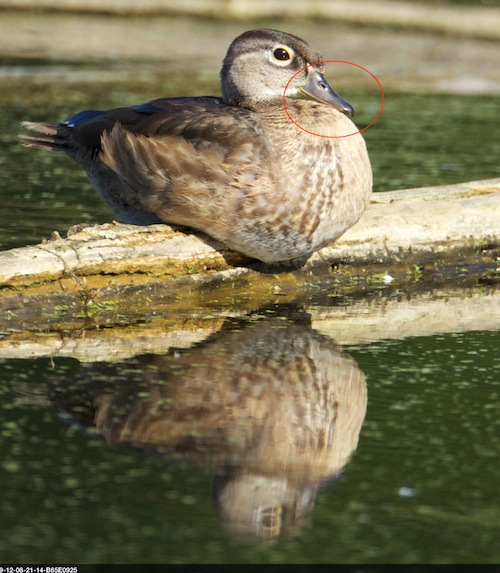
The second image has the bottom line of the bill “merged” with the top line of the body – doesn’t appear natural and is a little disruptive.

The third image is better, there is separation between the bill and the body – but just a sliver. Again, this is a little distracting to the eye. The composition (in the opening photo) has more separation and a more upright head angle, producing the best overall image.
As your photography improves, you should begin looking for these types of details in the field – and understanding when to pull the trigger. It comes with practice and will naturally get better with the more images you take. You’ll notice things like eye contact and head angle – when the background is not working for you and when various elements are pleasingly separated.
Stay in Focus,
Mark
Don’t Let the Mid-Day Sun Ruin Your Photo Outing
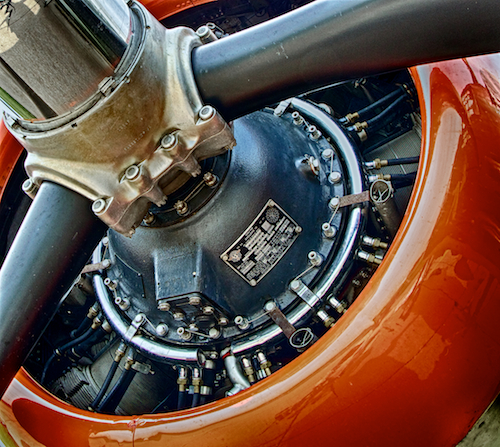
Yes, for outdoors shooting it’s hard to beat the “magic hours” of sunrise and sunset – and the two to three hours after sunrise and before sunset aren’t too bad either. But what do you do with that “11-3” slot? Here’s two scenarios to try.
Get in Close
The harsh mid-day light will have less impact on your shots if you get in close to the subject and eliminate any background elements. You purposefully minimize the high contrast range in your shot. The engine shot above was at high noon. By getting in close I eliminated the bright sky and white concrete – not to mention the reflections off the leading wing edges.
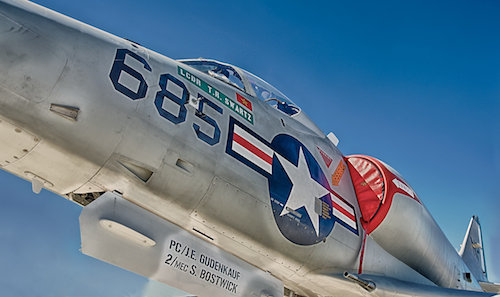
Shoot HDR
You don’t like HDR you say? Really? Maybe it’s the “grungy” HDR that doesn’t suit your style?
Remember, that “grungy” and exaggerated look is only one style of HDR. High Dynamic Range photography can look anywhere from very natural all the way to over the top. Shooting HDR at high noon (the way the second image above was shot) makes the lighting conditions virtually irrelevant. Take 3 to 5 shots over a range of exposures, use your favorite HDR or stacking program and make a great natural looking shot.
Many More Ways
There are many other scenarios to use during “bad” lighting times, not just these. Plenty of interesting things can be found in the shade and a small diffuser can give you a bit of your own shade for smaller objects. Flowers, insects, old fences, abandoned equipment. Take the time to look and you’ll find your mid-day shots!
Stay in Focus,
Mark
Aircraft Panning Basics
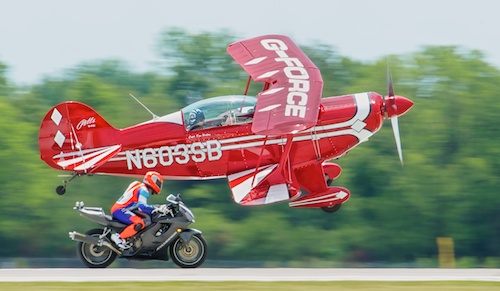 Panning Shots – The Practice is Worth it!
- Stance
- Spread your feet about should width apart – provides a stable platform and good balance
- Don’t move your feet or your shoulders – pivot at your waist
- Consider the arc of your pan, and face closer to your ending position – twist back to get to your starting point
- This places what should be your best balanced position towards the end of your pan, allowing for better control
- Holding technique
- There are many ways to do this and not necessarily “one” right way – this is how I do it:
- Press the camera against your face to increase stability. A larger, cushioned eye-cup can make this more comfortable and effective
- Tuck your elbows into your side, increasing stability
- Lean slightly into your shot – this will create a more stable “triangle” between your face, front hand and tucked in elbows
- There are many ways to do this and not necessarily “one” right way – this is how I do it:
- Settings
- Shutter speed will be limited by your panning technique, with propeller driven aircraft requiring the most skill. Begin your practicing with no lower than 1/750th of a second shutter speed and move down as you become comfortable
- Checkout the article on Air Show Shutter Speed to learn more about proper settings and the different scenarios you will encounter
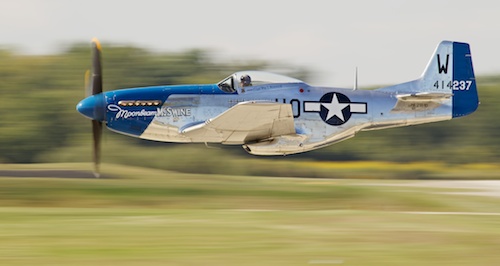
- Select your target
- While you can use multiple focus points, I’ve found it best to use the single point selection option – and lock it on target
- Pick a spot on the aircraft, place your focus point of choice on it and keep it there (yes, easier said than done)
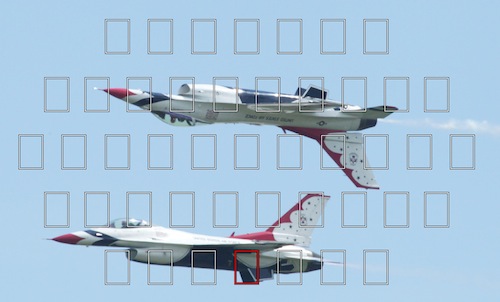
- This doesn’t have to be the center point. As illustrated below, your target won’t necessarily have a viable center spot
- Aim and move
- Once you’ve locked your focus point in place, practice your panning
- Depending on your target and the arc it’s traveling, the speed will not be constant – you’ll have to adjust with your target
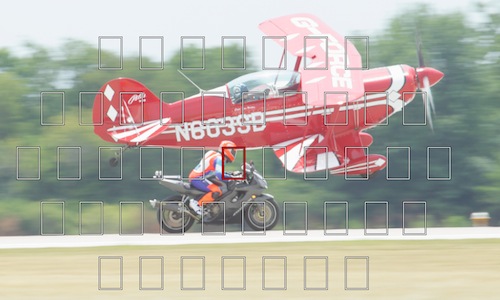
- The bike shot below (shutter speed of 1/ 180th) was extra difficult as the bike and plane were not traveling at the same rate of speed for most of the run. 20 images yielded only one that was sharp enough.
- Once you’ve locked your focus point in place, practice your panning
- Follow through
- You want to shoot on continuous – as fast as your camera can go. With practice you’ll surely get better and have more “keepers” but even the best rarely achieve better than a 50/50 average keeper rate on difficult targets
- Start early . . . end late
- Begin your shooting sequence a second or two early – it will give you time to get the “rhythm” and allow your image stabilization to spin up
- Use image stabilization? Well, it depends. Read up on your camera / lens. Some systems have a special setting for image stabilization during panning
- At the end of your series of shots, keep the motion going past the point of action. You will naturally tend to slow down at the very end and you want to ensure you’re still in rhythm when your last shutter click occurs
- Begin your shooting sequence a second or two early – it will give you time to get the “rhythm” and allow your image stabilization to spin up

- Practice
- There really is no substitute for it, and it’s amazing how much better your equipment seems to work when you practice!
- Don’t get discouraged. Action shooting has a lot going on, focus on one issue at a time (panning, lower shutter speed captures, exposure, composition) and build up gradually. Want to learn some other Air-show basics, check out this article from the beginning of the 2012 season.
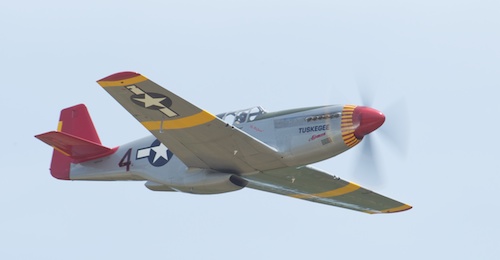
P-51C at 1/125th shutter speed
Have fun and stay in focus!
Mark
Airshow Basics
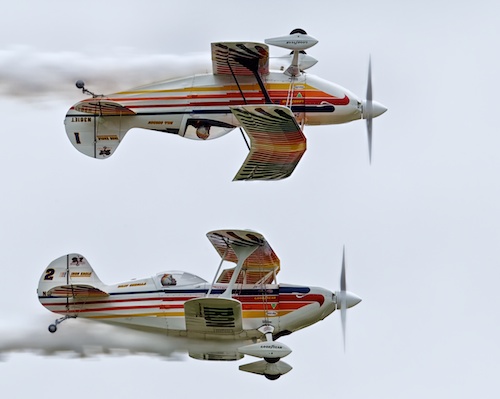 Birds of a different feather . . .
Air shows are a great excursion for the family – and a super way to extend your photography into new areas. Here are tips and tricks to get you started.
Job #1 take care of yourself
It’s easy to get caught up in the excitement and not realize you’re getting over heated so take care.
- Protection from the sun
- Even on an overcast day, the dangers are there
- Stay hydrated
- Drink more than you think you need. Waiting until you get thirsty is not good enough
- Stay comfortable
- Clothing that is light and breathable
- Good walking shoes – you will be doing some “walking”
- Accessories
- Chairs, sun glasses and ear protection – to name just a few
- Check the air show website for FAQ’s, it’s not uncommon for a show to prohibit bags – you may have have to hump your equipment in without your camera bag.
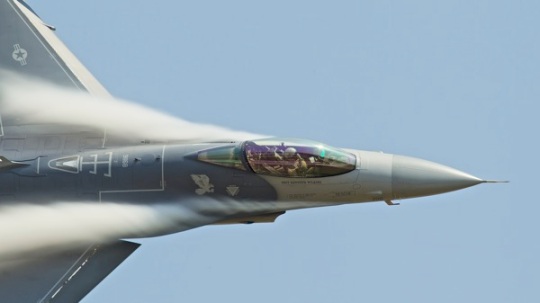
Equipment
- Lens selection
- Short lens: something in the 24-70 or 24-105 range
- Plenty of opportunities for wide angle crowd shots as well as static displays
- In-flight lens: a 70-200 is minimum but a 70-300 is a better choice. A lens that get you up to 400 is optimum
- You’ll want a variable telephoto as the aircraft are constantly changing positions
- Short lens: something in the 24-70 or 24-105 range
- Camera body
- Whatever you shoot with is fine
- Bring an extra, fully charged battery
- A comfortable strap (remember, you might not have your camera bag with you)
Some Basic Tips
- Camera Settings:
- Focusing Mode: AI Servo (as Canon calls it) is mandatory. These guys fly pretty fast!
- Multiple shots: set you camera to take images as fast as it can – you’ll want to select from the best of a sequence
- Aperture: it can be hard when you need light, but you don’t want to shoot too close to your maximum aperture. With even a single aircraft, you could need 12-20 feet of depth of field to get the entire ship in focus.
- Single aircraft: f/8 is minimum, assuming a good distance between you and the aircraft in flight.
- Multiple aircraft: f/11 is minimum, but f/14 is a safer choice
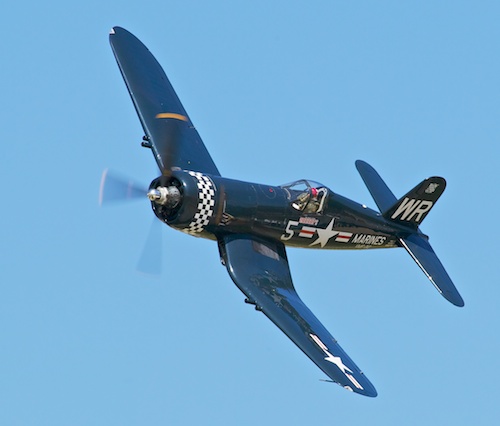
- Shutter speed:
- This one deserves a dedicated post (on its way) but some basics are:
- Jets: you’ve got latitude here, use as fast a shutter as you can
- Prop: this is where it gets challenging. You want to see the prop “blur” in your shot. This can require shutter speeds as low as 1/250th or lower. But you need to have your panning technique down cold in order to ensure the aircraft itself is in focus
- This one deserves a dedicated post (on its way) but some basics are:
- Harsh light
- Most air shows take place during the middle of the day, not much you can do about it. Here are a couple things to look into though:
- Evening shows: many air shows will have a Friday night event at dusk – take advantage of these!
- Get to the show very early. Usually aircraft will be flying in during the early morning hours, including static displays. This could allow you a shot or two with some good light
- Most air shows take place during the middle of the day, not much you can do about it. Here are a couple things to look into though:
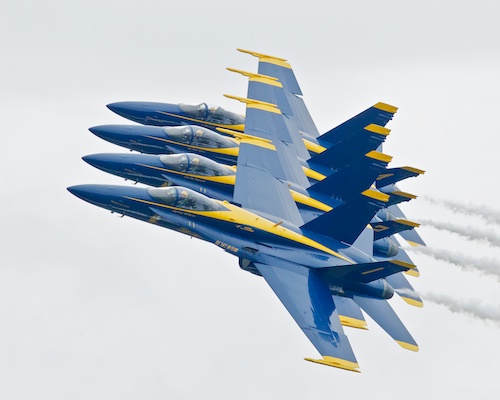
- Expose for the aircraft – don’t worry if everything else is blown out or blocked up
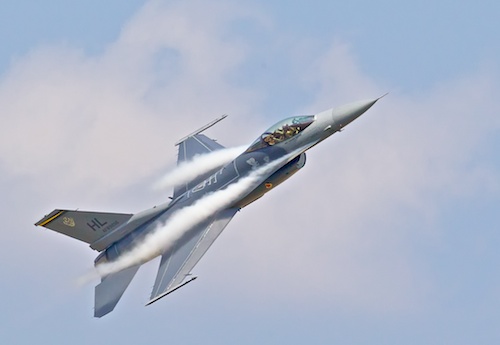
- Composition considerations
- Leave room to fly into. Don’t butt the nose of the ship right up against the edge of your frame
- Look for different angles, including aircraft flying away from you – unlike animals or people, there is no “head angle” to worry about!
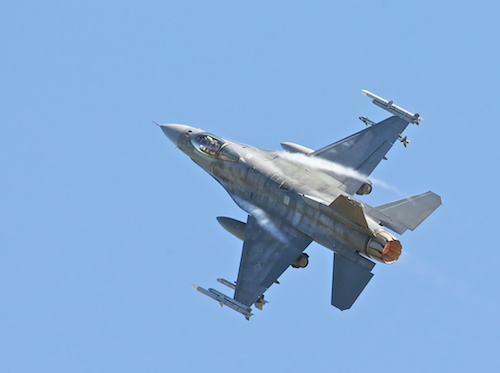
Pre-Show Tips
- Check on show locations and dates
- Especially the time the gates open
- Special seating
- Some shows (for a price) have VIP seating that can also include shelter and beverages
- Flight line seating, get there early
- Pay attention to the gate opening time. If you don’t have VIP seating, you’ll want to get there early to grab a spot right on the flight line
In upcoming posts, we’ll also take a deeper look at more advanced considerations
- Shutter speed: how to enhance your shots depending of type of aircraft
- Panning: how to perfect your rythm
- Depth of Field: how to capture multi aircraft and special routines
Check back soon for these informative posts.
Stay in focus,
Mark
 Leave a comment